

I still remember the first time I cooked beef back ribs — I was excited, a little intimidated, and totally unsure if I was doing it right. But after a few tries (and some very chewy mistakes), I finally nailed it. And let me tell you: once you get this down, you’ll come back to it every time you crave fall-off-the-bone, flavor-packed ribs.
This recipe is what I’ve perfected over time. No need for a smoker or fancy ingredients — just a solid cooking method, the right seasoning, and a little patience. Whether you’re grilling outside or using your oven, I’ll show you how to make tender, juicy beef back ribs that turn out amazing every single time.
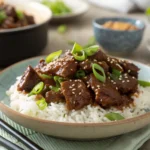
Check out our flavorful twist on beef dinners with this Mongolian Beef recipe — it’s bold, quick, and just as satisfying.
If you’re here because you’ve got ribs and don’t want to mess them up — this is your guide. You’re going to do this like a pro.
What Are Beef Back Ribs?
What Makes Beef Back Ribs Special
Beef back ribs come from the ribeye section — so yes, you’re working with bones that once held some of the most flavorful meat on the cow. The meat isn’t thick on top, but it’s packed between the bones, and when cooked right, it’s juicy and delicious.
They’re often overlooked in favor of short ribs , but they deserve their own spotlight. When done well, they’re just as satisfying — with a bold, beefy bite and a texture that melts in your mouth.
Not the Same as Short Ribs
A quick heads-up: beef back ribs ≠ beef short ribs. Short ribs are thicker, meatier, and better for braising. Back ribs are leaner and perfect for oven roasting or grilling. If you’re looking for that BBQ-style rib experience, you want beef back ribs.
Buying Tips
When shopping, look for racks that have meat between the bones, not just bare bone. Avoid overly trimmed or fatty racks. Local butchers usually offer better cuts than big-box stores — and if you can, ask to keep the membrane on so you can remove it fresh at home (I’ll walk you through it later).
Ingredients You’ll Need

Keep It Simple, Keep It Bold
One of the best things about this recipe is how few ingredients you actually need. We’re not doing anything fancy or hard to find — just solid flavors that bring out the best in the beef. And no, you don’t need a store-bought marinade or a sugary glaze. Trust me, you won’t miss either.
Here’s what I use every single time:
| Ingredient | Why It Matters |
|---|---|
| Beef Back Ribs (1-2 racks) | The star — look for meaty ribs with minimal fat |
| Olive Oil | Helps the seasoning stick and aids caramelization |
| Kosher Salt | Brings out the natural beef flavor |
| Fresh Ground Black Pepper | Adds bite and depth |
| Smoked Paprika | Gives it that subtle smokiness (especially in oven) |
| Garlic Powder | Boosts savory flavor without overpowering |
| Onion Powder | Adds balance to the rub |
| Ground Mustard (optional) | Adds a tangy undertone that pairs well with beef |
Feel free to tweak the dry rub to your taste — but these base seasonings always work.
Tip: Want a spicy kick? Add a pinch of cayenne or chili powder. I do it when I want a little heat, and it never disappoints.
Optional (But Delicious): Homemade BBQ Sauce
This is optional — I usually serve ribs “dry” with sauce on the side, but here’s a quick and clean BBQ mix you can make in under 10 minutes :
- 1 cup ketchup
- 2 tbsp apple cider vinegar
- 1 tbsp molasses or honey
- 1 tsp Worcestershire sauce (check label for beef-based versions)
- 1/2 tsp smoked paprika
- Salt + pepper to taste
Simmer it for 5 minutes and that’s it. Done. You’ll never go back to bottled stuff.
How to Prep Beef Back Ribs

Remove the Membrane
Okay, this part is crucial — and easy once you’ve done it once. Beef back ribs usually come with a silver membrane on the bone side. If you don’t remove it, it turns rubbery during cooking and blocks flavor.
Here’s how I remove it:
- Flip the ribs bone-side up.
- Gently work a butter knife beneath the membrane at one end of the ribs.
- Use a paper towel to grip the loosened corner and peel it off in one go.
If it tears, no big deal — just work in sections until it’s gone. This step alone makes a massive difference in texture and taste.
Pat Dry and Season
Next, grab some paper towels and dry those ribs well. Moisture on the surface = steam. And we don’t want steam — we want a flavorful crust.
Rub the entire rack with olive oil, then coat generously with your dry rub. Don’t be shy. This is your flavor foundation, and the ribs can handle it.
Let Them Rest
Once seasoned, I like to let the ribs sit at room temperature for about 30–40 minutes before cooking. This lets the seasoning soak in a bit, and helps the meat cook more evenly — especially if it was fridge-cold.
Pro tip: For deeper flavor, season the ribs and let them sit uncovered in the fridge overnight. It works like a dry brine and enhances the taste.
Cooking Methods (Oven or Grill — No Smoker Needed)
So, your beef back ribs are trimmed, seasoned, and rested. Now it’s time to cook them. Good news? You don’t need a smoker. Both the oven and grill will get you tender, fall-off-the-bone results — I’ve done both many times.
Choose the method that works best for your setup and the weather outside. I’ll break down both for you:
Oven-Baked Beef Back Ribs

This is my go-to method when I want consistent results without firing up the grill. The key is low and slow — and sealing in moisture.
How to bake beef back ribs in the oven:
- Preheat your oven to 300°F (150°C).
- Place the ribs on a baking sheet, bone side down, on a wire rack (or directly on foil if you don’t have a rack).
- Wrap the entire tray tightly with foil. This traps steam and keeps the ribs juicy.
- Bake for 2.5 to 3 hours, depending on the size of the rack. You’ll know they’re ready when the meat has pulled back from the bones and is fork-tender.
- If you want a crust: Remove the foil, brush on BBQ sauce (optional), and broil for 3–5 minutes until lightly charred.
Tip: If you’ve got a meat thermometer, you’re aiming for around 195°F–205°F internal temp. That’s the sweet spot for tenderness.
Grilled Beef Back Ribs
Grilling gives you that smoky char and fire-kissed flavor. I usually go this route when I’m cooking outdoors and want that real BBQ feel without using a smoker.
How to grill beef back ribs (indirect heat method):
- Preheat your grill to medium-low heat (around 275°F–300°F).
- Set up two zones — one for direct heat and one for indirect cooking.
- Place ribs bone side down over indirect heat, close the lid, and cook for 2.5–3 hours, maintaining consistent heat.
- In the final 15–20 minutes, shift the ribs toward the heat source, add a layer of sauce if desired, and allow them to caramelize.
Take your time — using indirect heat allows the collagen to break down gradually, creating that perfectly tender, pull-apart texture.
No matter which method you choose, the results will be worth it. And once you nail the timing once, you’ll be able to do it in your sleep.
Want to turn dinner into a surf-and-turf night? Try our Grilled Lobster Tail Recipe — it pairs beautifully with these beef ribs.
How to Know When They’re Done
You’ve seasoned, cooked low and slow, maybe even basted with sauce — but how do you know when your beef back ribs are actually done?
Here’s the truth: timing alone isn’t enough. Every rack of ribs is different — thickness, fat content, bone size — so instead of guessing, here’s how I know they’re ready every single time.
The Magic Internal Temperature
The sweet spot for beef back ribs is when they reach 195°F to 205°F (90–96°C) internally. At this range, the connective tissue breaks down, making the ribs buttery and tender without falling apart completely.
Use a meat thermometer to check the thickest part of the meat (without touching bone). I always check around the 2.5-hour mark.
If you don’t have a thermometer, no stress — just rely on visual cues.
Visual Signs They’re Ready
Even without a thermometer, there are some clear signs your ribs are done right:
| Sign | What It Means |
|---|---|
| Meat pulls back from the bone | A classic sign they’re done and tender |
| A toothpick slides in easily | Like testing cake — if it goes in with no resistance, they’re ready |
| Juices run clear, not red | You don’t want blood — clear juices mean safe and done |
| They bend easily when lifted | Pick up with tongs — if they flex and nearly break, they’re tender |
I always tell friends: trust your eyes and hands more than a timer. Ribs will tell you when they’re done — you just need to know what to look for.
What to Avoid
Here’s what not to do:
- Don’t go by time only — it’s just a guide.
- Don’t slice too early — let them rest for 10 minutes before cutting.
- Don’t cook past 205°F — you’ll lose juiciness and texture.
Quick tip: If they look done but feel a little tough, wrap them in foil and rest for 30 minutes. It helps redistribute moisture and softens them more.
Serving Suggestions

You’ve made tender, smoky, flavorful beef back ribs — now it’s time to plate them up. While the ribs are absolutely the star, pairing them with the right sides and sauce options can turn this into a full-on feast.
I like to keep it simple and rustic, just like the ribs themselves.
The Best Sides for Beef Ribs
Here are some go-to sides that balance richness and add texture to the plate:
| Side Dish | Why It Works |
|---|---|
| Roasted or mashed potatoes | Classic pairing — hearty and filling |
| Grilled corn on the cob | Sweet, smoky, and seasonal |
| Tangy coleslaw | Adds crunch and cuts through the richness |
| Garlic green beans | Fresh and flavorful, super quick to make |
| Baked mac and cheese | For a comfort food overload (worth it) |
When I serve ribs at a backyard dinner, I usually pair them with coleslaw and grilled corn. Simple, easy, always a hit.
Planning a cozy dinner lineup? Don’t miss our Chicken Pot Pie Casserole — it’s a hearty, comforting dish that always satisfies.
Sauce or No Sauce?
This comes down to preference. Some folks swear by a sticky BBQ glaze, others (like me) prefer to serve sauce on the side, so the dry rub and meat shine through.
If you did make that homemade BBQ sauce from earlier, now’s the time to offer it up. Otherwise, choose a sauce that’s balanced — not overly sweet, and never overpowering the beef.
Just remember: with beef ribs, the meat speaks for itself. Sauce should be an option, not a mask.
Common Mistakes to Avoid
Even with the best ingredients and intentions, beef back ribs can go sideways if you’re not careful. Here are the biggest mistakes I’ve seen — and made myself — and how you can steer clear.
Cooking at Too High a Temperature
Fast cooking = dry ribs. Period. Whether you’re grilling or baking, stick to low and slow. I know it’s tempting to crank the heat, but all that does is dry out the meat and kill your hard-earned flavor.
Skipping the Membrane Removal
I’ve made this mistake more than once. Leaving that silver skin on the back of the ribs makes them chewy and blocks seasoning from getting into the meat.
Take the extra 2 minutes and peel it off. It’s always worth it.
Underseasoning
Ribs can handle a lot of seasoning. If you go too light, you’ll end up with flat, boring results. Don’t drown them in rub — but don’t be shy either. A well-seasoned rib is a flavorful rib.
Not Letting Them Rest
Just like steak, ribs need to rest before you cut into them. Give them 10 minutes under foil to let juices redistribute. Cut too soon and you’ll lose that moisture you worked so hard to build.
Overcooking Past 205°F
Yes, ribs need time — but there’s a point where they go too far. Once the internal temp creeps beyond 205°F, you risk mushy meat and dried-out fat. Always monitor toward the end of cooking.
Pro tip: If you’re unsure, it’s better to pull them slightly early and let them finish cooking while resting in foil. Residual heat works in your favor.
Storage & Reheating Tips
If you’ve got leftover beef back ribs (lucky you), storing and reheating them the right way can make all the difference between dry disappointment and a second round of juicy, flavorful goodness.
How to Store Leftover Ribs
Here’s exactly how I handle leftovers in my kitchen:
Refrigerator:
- Let the ribs cool to room temp (but don’t leave them out more than 2 hours).
- Seal the ribs tightly in foil or store them in an airtight container.
- Keep refrigerated and use within 4 days.
Freezer:
- Wrap tightly in foil, then seal in a freezer-safe bag.
- Label with the date.
- Store for up to 3 months.
I usually slice them into individual ribs before freezing — makes reheating faster and more even.
Best Way to Reheat Beef Back Ribs
Avoid the microwave if you can. It dries out the meat and turns that lovely bark into rubber.
Here’s what works best for me:
| Method | Steps |
|---|---|
| Oven (Best Overall) | Preheat to 275°F. Wrap ribs in foil with a splash of broth or water. Heat for 20–25 minutes. |
| Stovetop (Quick) | Add ribs to a covered skillet with a bit of broth. Steam on low for 10–15 minutes. |
| Air Fryer (For crispy ends) | Heat at 350°F for 8–10 minutes, checking halfway. Good for texture, but keep an eye on dryness. |
Pro tip: Reheat with a bit of added moisture (like beef broth or even a touch of water + BBQ sauce). It helps the ribs stay juicy and fresh-tasting.
Frequently Asked Questions About Beef Back Ribs
Can beef back ribs be smoked?
Beef back ribs work incredibly well in a smoker. They soak up smoky flavor easily and become tender with a rich, beefy taste. Stick to hardwoods like oak, hickory, or cherry, and maintain a smoker temperature of around 225°F. Let them smoke low and slow for 4 to 5 hours, aiming for an internal temperature between 195°F and 205°F. That’s the range where collagen softens and the ribs reach that juicy, melt-in-your-mouth texture.
What’s the difference between beef back ribs and spare ribs?
Beef back ribs come from the same section as ribeye steaks — the back of the cow — and have meat mostly between the bones. They’re known for their bold, beefy flavor and a slightly leaner texture compared to other rib cuts. The bones are longer and curved, with meat nestled in between, rather than on top.
How do you make beef back ribs tender without a smoker?
You don’t need a smoker to get tender beef ribs. The trick is low-and-slow heat, sealed in moisture, and patience. Oven-bake them at 275–300°F wrapped tightly in foil for 2.5 to 3 hours. Let them rest before serving. This method keeps the meat juicy and breaks down the tough connective tissue — no smoke required.
Should you marinate beef back ribs before cooking?
It’s not necessary to marinate beef back ribs. A good dry rub with salt, pepper, and a few bold spices will do more than enough to enhance the flavor. Marinating is optional, and if used, keep it simple — oil, garlic, and a little vinegar. Avoid over-marinating with acids, which can break down the meat too much.
Can you cook beef back ribs in the oven only?
Absolutely. Baking is one of the most dependable methods for cooking beef back ribs. Just wrap them in foil, place them in a 300°F oven, and let them cook for 2.5 to 3 hours. To finish, give them a quick broil to create a caramelized crust. It’s a simple, no-grill-needed approach that delivers tender, fall-off-the-bone ribs every time.
What kind of BBQ sauce works best with beef ribs?
Beef ribs go best with sauces that are rich in flavor—think smoky, tangy, and just a little sweet. You can opt for a quality store-bought version or whip up a simple homemade blend using ketchup, vinegar, molasses, and spices. Personally, I prefer serving the sauce on the side to let the bold taste of the meat and dry rub take center stage.
Conclusion
If you’ve made it this far, you’re more than ready to make incredible beef back ribs at home. Whether you’re baking them in the oven or grilling outdoors, the key is simple: season well, cook low and slow, and trust the process.
This recipe has never failed me, and now it’s yours. Don’t overthink it. Let the meat do the talking, keep your rub bold, and give the ribs time to transform into something unforgettable.
Looking for another reader favorite? Try our Tater Tot Casserole with Ground Beef — it’s cozy, cheesy, and loved by families.
And hey, if you give it a try — tag me or drop a comment. I’d love to hear how it goes.

Beef Back Ribs Recipe
Ingredients
Equipment
Method
- Remove the membrane from the back of the ribs using a paper towel and a butter knife.
- Pat dry the ribs, then coat them with olive oil.
- Combine seasonings in a bowl and rub generously over all sides of the ribs.
- For oven method: Preheat oven to 300°F. Wrap ribs in foil and place on a baking sheet. Bake for 2.5 to 3 hours.
- For grill method: Set up two-zone heat. Grill ribs over indirect heat at 275–300°F for 2.5 to 3 hours.
- Finish ribs by brushing with BBQ sauce and broiling for 3–5 minutes (oven) or moving to direct heat on grill.
- Let rest for 10 minutes before slicing and serving.
Notes
- For the best flavor, season the ribs and let them sit uncovered in the fridge overnight. It acts like a dry brine and makes the meat more flavorful and tender.
- If you’re using the oven method, adding a splash of beef broth before sealing the foil helps lock in moisture.
- Don’t skip removing the membrane—it’s a simple step that dramatically improves texture.
- Always let the ribs rest for about 10 minutes after cooking. This keeps the juices in and the meat tender when slicing.
- Use a meat thermometer if you have one. The ideal internal temperature is between 195°F and 205°F for perfectly tender ribs.
- This recipe works great both in the oven and on the grill. Choose whichever method fits your setup or the weather outside.
- Serve with your favorite BBQ sauce on the side to let the dry rub shine through.
- Great side options: coleslaw, mashed potatoes, baked beans, or grilled corn on the cob.